Does your shower still look dull and dirty, even after a thorough cleaning? The problem might be your grout. Over time, grout absorbs moisture, dirt, and grime, making your bathroom look unclean no matter how much you scrub.
So, will sealing the grout improve the appearance of your shower? Absolutely. A good sealer protects the grout from moisture, stains, and bacteria. Just be sure to choose a sealer that’s appropriate for your specific type of grout.
But better bathroom aesthetics aren’t the only benefit. Sealing grout can also extend its lifespan and make cleaning easier. Read on for more advantages, how to pick the right sealer, and a step-by-step guide to doing it yourself.
Why You Should Seal Shower Grout
Most traditional shower grouts are made from a mix of sand, cement, and water — materials that are naturally porous. This means they easily absorb moisture, along with soap scum, hair, and dirt. Over time, this can make your grout look stained and grimy, and even turn it into a breeding ground for mold and bacteria.
Sealing your grout creates a protective barrier that keeps out moisture and debris. Here are a few key benefits:
- Enhances the overall look of your bathroom
- Prevents moisture, dirt, and grime from penetrating the grout
- Extends the life of your grout and keeps it looking fresh
- Low-cost, easy-to-do DIY project with long-lasting results
Note that if your shower uses epoxy grout, sealing isn’t necessary. Epoxy grout is water-resistant, highly durable, and less prone to cracking or staining. However, it tends to be more expensive and isn’t compatible with all tile types.
How to Seal the Grout in Your Shower
Sealing the grout in your shower doesn’t require the assistance of a professional. The process is super easy, and anyone can do it. That said, it may take some time, even days, for very small tiles and some hours for larger tiles.
Here’s a step-by-step procedure for sealing shower grout:
1. Get Your Tools Ready
You’ll need the following materials for this task:
- Hand Gloves
- Damp towel and water
- Sealer
- Eye protection
- Cheesecloth pad
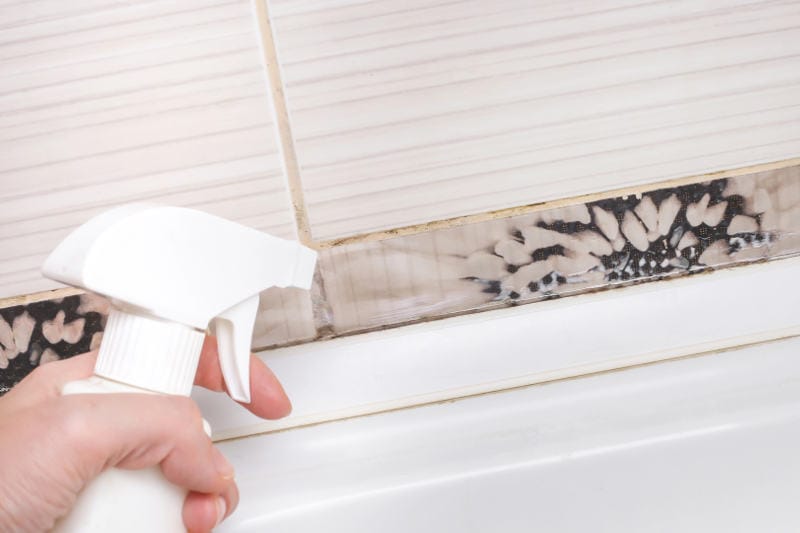
2. Clean the Surface of the Grout and Tile
Make sure the shower grout is completely dry before you begin. Start by thoroughly cleaning the grout lines and surrounding tiles with a damp cloth and clean water. Take your time to remove all visible dirt and grime, especially from within the grout.
If the grout isn’t properly cleaned, any leftover bacteria or debris can become trapped under the sealant. This creates the perfect environment for bacteria to grow and may cause the sealant to deteriorate over time.
Be sure to ventilate the space while cleaning by opening windows or doors, if possible. Don’t forget to wipe down the tiles as well for a clean, even surface.
3. Allow Some Time Before Applying Sealer
After cleaning, don’t apply the sealant right away. Allow the grout to dry for at least 12 hours in a well-ventilated space. If ventilation is limited, it’s best to wait up to 24 hours. This drying time ensures the grout is fully cured, helping the sealant adhere properly and last longer.
4. Apply the Sealer
When the grout has cured well, it’s time to apply the sealer. There are more ways of doing this, so you can go with whichever works best for you:
- Brush method: You can apply some sealers (like this one) to your grout using a brush (or even a rag). Now, this method is the most difficult and can be super tedious. You use a small brush and apply the sealant on each grout line.
- Wheel-on method: You can also use a container with a rolling tip. The rolling tip is easier to use than the brush, as the brush barely misses the line.
- Spray method: Some sealers (like this one) come as sprays, so some people will argue that the spray method is the easiest. All you have to do is spray the sealant all over the tile and grout. The real work starts when you start cleaning the tile one after the other carefully so as not to clean out the sealant from the grout.
Sealers aren’t meant to touch the tile, but can anyone be that careful? Well, if the sealer touches the tile when you are applying it, wipe it off immediately with a damp rag; otherwise, it’ll stick to the tile.

- SEAL SMARTER. Breathe Easy Stain Block Technology...
- NON-TOXIC. Zero VOC, Water Based, Plant Based...
- EASY TO USE SPRAY FORMULA. Simply Pour Ready To Use...
- INDOOR & OUTDOOR PROTECTION. Keeps Your Indoor...
If you’re looking for more product recommendations for each method, check out our guide to the best grout sealer products.
5. Allow the First Layer of Sealer to Dry
After applying the first layer of sealant, let it sit for 15–20 minutes before applying a second coat. Some products may require a longer wait time, so it’s important to check the manufacturer’s instructions for specific guidance.
When in doubt, it’s safest to allow the sealant to cure for at least 24 hours before exposing it to moisture or heavy use.
6. Apply the Second Layer
Some sealers only require one layer, while others need two. Either way, it’s a good idea to apply a second layer while you’re already at it — just to ensure better protection. When applying the second coat, follow the same steps as the first, including proper drying time and cleanup.
No matter how long it takes, always let the sealant cure completely before using the shower again. Once fully cured, the sealant will provide maximum durability and long-lasting results.
7. Test Your Sealer
It’s now time to test if all your hard work has paid off.
Splash water on the grout; if the water gets soaked up, something is wrong. You can tell the job is done right if the water rolls down the tiles and doesn’t get soaked in.
Does Shower Grout Need to Be Resealed?
The seal applied on shower grout doesn’t last forever. Some sealer may last some 5-10 years, while others must be resealed every six months to 1 year, especially those applied in frequently used bathrooms. For guest bathrooms or bathrooms not frequently used, you can reseal after 3-4 years.
The best way to know when to reseal the grout is when you discover that water gets soaked in and no longer puddles on the grout.
Choosing the Right Sealer
There are two types of sealer — penetrating and non-penetrating sealers:
- Penetrating sealers: Penetrating sealers fill the grout from deep within. They fill all the grout’s pores from deep within up to the surface. This allows it some air exposure, making it ideal for wet environments like bathrooms, showers, and tubs.
- Non-penetrating sealers: These sealers only seal the top of the grout and not within it. The space within then serves as a breeding ground for mold and bacteria. These seal sealants are, therefore, not ideal for damp areas.
Conclusion
Sealing the grout in your shower will give your shower a new glowing look at all times. However, before purchasing a sealer, ensure it’s ideal for the tiles in your house. Sealers don’t last forever, so you may need to seal them again after a few years.