Removing a door latch or lock can leave behind unsightly holes that stand out, especially if you’re repainting or repurposing the door. Fortunately, filling door latch holes is a straightforward DIY project that requires only basic tools, common materials, and a bit of patience.
With the right preparation and technique, you can repair these holes so they blend seamlessly with the rest of the door surface. The steps below walk you through the process from start to finish, helping you achieve a smooth, paint-ready result.
1. Smooth the Hole and Surrounding Surface
Before filling a latch hole, it’s important to smooth the area so the filler can bond properly and dry evenly. Any raised paint, splinters, or rough edges will affect how clean the final repair looks.
Use medium-grit sandpaper (around 120–150 grit) to gently sand away loose paint and rough wood around the hole. Sand just enough to create a flat, even surface — there’s no need to remove more material than necessary.
If there are stubborn ridges or chipped edges, carefully scrape them away with a putty knife. Use light pressure and work slowly so you don’t gouge the surrounding wood. Taking your time here will make the filling and finishing steps much easier.
2. Remove Dust and Debris
After sanding and scraping, dust and paint particles often collect inside the latch hole and on the surrounding area. This debris can prevent the filler from adhering properly.
Use a vacuum to remove dust from the hole and door surface. A brush or narrow nozzle attachment works best for reaching inside the cavity. Once vacuumed, wipe the area with a slightly damp paper towel or cloth to remove any remaining residue.
Make sure the surface is completely dry before moving on to the filler.
3. Prepare Your Filler
Once the latch hole is clean and completely dry, it’s time to prepare the filler. The type of filler you choose depends mostly on the size and depth of the hole you’re repairing.
Common options include:
- Wood filler, which works well for small to medium latch holes and surface-level repairs
- Epoxy wood filler, which is stronger and better suited for deeper or wider holes that need extra durability
For example, if you’re filling a shallow latch hole left behind by a removed strike plate, a standard wood filler is usually sufficient. If the latch hole is deep or the wood around it is damaged or crumbly, an epoxy wood filler will provide a stronger, longer-lasting repair.
Some fillers come ready to use straight from the container, while others require mixing two components together before application. Always read and follow the manufacturer’s instructions on the packaging, as mixing ratios, working times, and drying times can vary between products.
If you’re using a two-part filler, mix only a small amount at a time. These fillers begin to harden shortly after mixing, so preparing too much at once can lead to wasted material. Work within the recommended time window to ensure the filler spreads easily and bonds properly.
Once the filler is mixed to the correct consistency and is still workable, you’re ready to move on to filling the latch hole.
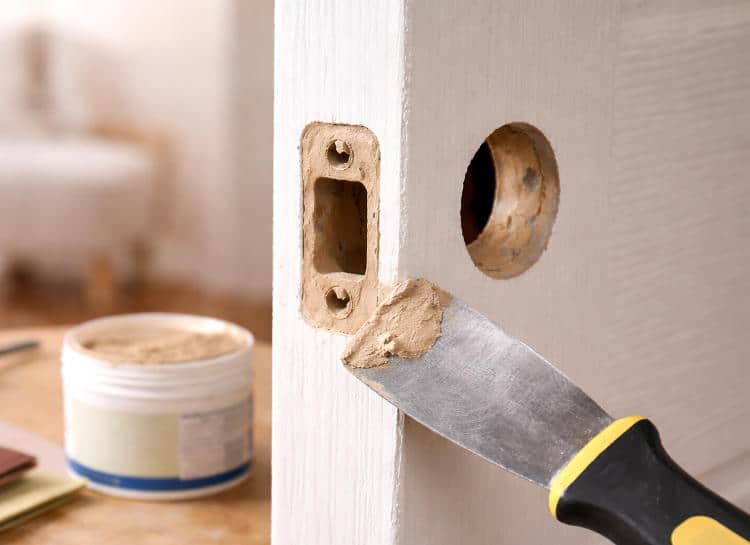
4. Fill the Latch Hole
Use a putty knife to apply the filler to the latch hole. If you don’t have one, any flat, smooth-edged tool will work, such as:
- a cut-up credit card
- a paint stirrer
- a ruler
- a butter knife
Scoop a small amount of filler onto the tool and press it firmly into the hole. Start at the edges and work toward the center, pushing the filler deep into the cavity to eliminate air pockets that could weaken the repair.
For shallow holes, a single layer of filler is usually enough. For deeper latch holes, apply the filler in thin layers, pressing each layer firmly into place before adding more. Slightly overfill the hole so the filler sits just above the surface — this allows you to sand it perfectly flush once it dries.
After filling the hole, smooth the surface with your tool using light, even strokes. The flatter you make it at this stage, the less sanding you’ll need later.
If the hole is especially deep, allow the first layer to dry according to the product’s instructions before applying additional thin layers. Continue building up the filler until the surface is level with the surrounding door material.
5. Let the Filler Dry and Smooth the Surface
Check the manufacturer’s instructions for the recommended drying time and allow the filler to set fully before sanding. This ensures the repair hardens properly and doesn’t pull out of the hole.
While the filler is still slightly soft, you can gently wipe away small ridges or excess material with a damp paper towel or cloth. This step can save time later by reducing how much sanding is needed.
Once the filler has fully dried, it will usually change to a lighter, more uniform color. At this point, sand the area smooth using fine-grit sandpaper until it blends evenly with the surrounding door surface.
After sanding, you can apply primer and paint if needed to match the rest of the door and complete the repair.
Final Thoughts and Helpful Tips
Filling door latch holes doesn’t have to be complicated, and with the right approach, the repair can look nearly invisible once finished. Taking your time during each step — especially surface preparation and drying — will make a noticeable difference in the final result.
A few extra tips to keep in mind:
- Always apply filler in thin layers rather than trying to fill deep holes all at once. This helps prevent shrinking and cracking as the filler dries.
- Sand lightly and gradually. It’s easier to remove more material than to fix an area that’s been over-sanded.
- If you plan to paint the door, applying a primer over the repaired area will help the paint blend evenly and prevent the patch from showing through.
- For stained or natural wood doors, choose a stainable wood filler and test it on a small area first to check color matching.
With patience and attention to detail, filling a door latch hole is a manageable DIY task that can restore the door’s appearance and prepare it for its next use.