
Repairing rotten wood is not that hard when you have the right tools to do it. And one of the most important elements of that is the filler that you would use to repair wood.
Some of the best products for repairing rotten wood include Abatron WoodEpox, FamoWood, J-B Weld, and Elmer’s Stainable Wood Filler. However, if the rot isn’t big enough to require a filler, you can also get a Miller Scratch Pen and use it to remove all traces of rot.
However, quality products are only the beginning. You should know when to replace and when to repair, how to repair, etc. Read on to learn all about the best products for repairing rotten wood and more.
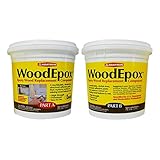
1. Abatron WoodEpox
This product is popular and often tops the lists for a good reason. It’s an epoxy filler for wood, and it provides full equipment for wood repair — epoxy filler and hardener, gloves, putty knife, and a manual to help you get through it with ease. All you need to do is remove the rot, and this manual will take you to the end.
The price may be a bit up there, but it will allow you to do your job well and quickly. Plus, you don’t have to wait too long for it to dry. It will be ready in an hour, so you will have enough time to work with it and yet not spend an entire day waiting for it to cake.
On the downside, this epoxy filler is not that easy to stain, so you might not want to use it for indoor purposes or where aesthetics matter. In most cases, this one is used outside, where people don’t care much about the look. Another reason why this is good for the outdoors is that it can be in the sun, and it won’t get ruined.
- REPAIR DAMAGED WOOD: Fills and rebuilds missing...
- EASY TO USE: Our wood epoxy has a 20-30 minute pot life...
- GREENGUARD CERTIFIED: This product contains almost no...
- NO SHRINKING OR CRACKING: This wood filler can be used...
Use it on any wood you like and need to use it on, with a caveat that it might be better on hardwood instead of other types.
2. J-B Weld 8257 KwikWood
This epoxy is not as famous as Abatron one, but it does cake pretty quickly — in less than 20 minutes — and the small amounts it comes in make it great for any of your smaller projects. The good thing is that you can use it on other things as well, in case you don’t spend it all on wood since it works on PVC too.
You probably won’t be able to stain it well, just like with Abatron, so try to use it outside or on wood that’s light since that’s the color the epoxy adopts once dried. Working with tools on this epoxy patch will be easy and more than possible soon after it’s ready.

- J-B WELD KWIKWOOD: A hand mixable two part epoxy putty...
- CURE AND SET TIME: After kneading the two part formula...
- PRODUCT FEATURES AND STRENGTH: J-B Weld KwikWood has...
- APPLICATIONS: Window/Door Hinge Repairs, Dry Rot...
While you can use it on any type of wood — like Abatron — it’s pretty dense, so it comes naturally that it’s better for hardwood objects.
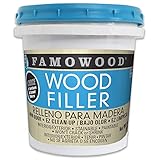
3. FamoWood 40022126 Latex Wood Filler
This filler is based on latex, so it will dry quickly, and it won’t smell as strongly. Even so, one of the biggest advantages of this filler is that it stains beautifully, unlike the previous two products. So, FamoWood is definitely made to enhance the aesthetic of the wood and for indoor use.
- Dries in 15 minutes
- Won't crack or shrink, solvent free – low odor and...
- Can be sanded, drilled or planed
- Stainable and paintable
It will absorb the color so well that you won’t be able to tell the difference. As mentioned, it dries quickly — under 15 minutes — and it’s not as expensive as some of these options. There’s a lot of it, so you won’t have to get two or three boxes just to make your repair.
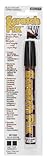
4. Miller SF1203 Wood Stain Scratch Fix Pen / Wood Repair Marker
This one is a bit different, but still useful enough to earn a mention. Sometimes the rot is not that big, and it doesn’t leave a big mark — especially if you notice it quickly. So, instead of having to remove the part and use a filler in such a small area, you might as well use a pen to do it.
It’s very small, but it packs a strong punch with 1000 coats. Of course, it’s unlikely that you’ll use up all of them at once since it’s primarily meant to serve smaller areas. This pen dries quickly — it’s small, so why wouldn’t it? — and you can get it in different shades to match your wood.
- Instantly dries and coats over to hides scuffs, gouges...
- Perfect blend with any very black/brown wood including...
- Contains waterproof wood stain instead of ink – wax...
- Applicable on any type of wood surface, from floors to...
Because of the small size, it’s also very cheap, so you don’t have to worry about your budget if you want to get it.
5. Elmer’s E887Q Stainable Wood Filler
Finally, we get to Elmer’s wood filler, which is extremely popular, while small and inexpensive. As the name of it says, it can be stained easily, which is why it’s a favorite. Another great thing about it is that it has actual wood fibers in it, which makes for great texture once it all dries.

- For interior and exterior use
- Resists shrinking and cracking
- Contains real wood fibers for superior sanding...
- 3.25-ounce tube
You can use it anywhere, especially because of the staining, you can work on it later with sandpaper or something similar. The tubes are small, so most wouldn’t say that it’s good for big areas, but if you want to, you can buy more of it, especially if you want to restore something to its former glory.
6. DAP Plastic Wood Latex Filler
This is another filler that has latex in it, but this one also has wood fibers, making it a good mixture of qualities. For example, it will have a texture similar to wood, but it will also be resistant to water, which is great.

- Repairs cracks, gouges + holes
- Shrink + crack resistant
- Strong nail + screw anchoring
You can buy this cheaply, which is especially good if you want to work on something bigger. The fumes may be a bit harder, so you might want to wear a mask and avoid working directly over it for longer. Before it cakes, it can be cleaned with water, but once you blend it in and it dries off, it will be resistant to water completely.
7. Minwax Wood Filler
This filler is excellent when you need something to do the job well — it’s supposedly very strong. At the same time, it won’t start cracking, even though it is a bit denser than other varieties. You can use it inside your home or outside, and it won’t absorb any water or change under its impact.
A good thing about this product is that it’s available in many colors, so you may not have to paint it over. If you pick the right color, that is. This filler also dries quickly, and it will allow you to work on it pretty soon after applying it.

- HIGH-PERFORMANCE WOOD FILLER – Minwax Wood Filler...
- REPAIR WOOD – The durable wood filler is a very...
- INDOOR/OUTDOOR – Weather, water, and rot-resistant...
- QUICK DRYING – The wood filler dries in just...
Once you mix it up, you have around 30 minutes until it’s completely dry. At 15 minutes, you’ll already begin to notice the hardening. Another good aspect of it is that it will work with other materials as well.
Instructions for Repairing Rotten Wood
Here are some instructions on how to repair rotten wood. But first, you’ll need to have some tools like:
- A claw hammer
- A router
- A putty knife
- A general knife
- A chisel for wood
- Sandpaper
Then, proceed to follow these steps:
Remove the Rotten Part
The rot on the wood should be removed thoroughly. You can use a hammer at first, or something similar to that, to get the rotten parts out. This is good only for the bigger parts.
If you want to, you can try with a claw hammer and pull the rot at its base. Try not to damage the good parts of the wood as you remove the rot. The rotting wood will be softer, so you should be able to remove it easily. Don’t force it too much.
If any wood remains — which will likely happen — you should use a router to strip any remaining pieces. Depending on the shape of your object and your hole, pick a bit to help you. Go back and forth until you’ve removed all bad wood. You’ll notice you’re done because there will be more resistance from the good wood.
You can also call a professional so they can check if the rot has gotten inside the wood or not.
Furthermore, you should sand off any paint and clean the dirt around the patch so that the epoxy will work there. Some wood restorer would probably also work, or a consolidator that would keep the area steady for you to apply the filler.
Patch It Up
As you start to patch the hole up, apply the bonding agent first before you apply epoxy. A thin coat will be enough, and then you should use your filler — whether pre-made or the one that has to be mixed up.
You can use a gun to apply it and disperse it properly. Follow the instructions and use up the epoxy before it dries out. Remember not to mix too much because it will dry and you will have to throw it away. Only mix as much as you need.
You should also make sure that you shape the patch that you get with that epoxy with a putty knife. Push as much epoxy into this area — the hole left behind by rot — and the epoxy should connect with the rest of the wood well. Press it down well.
Scrape anything extra that’s left behind. Smooth the rest of the epoxy and try to make the edges flat and equal to the wood. Let it dry for the amount of time stated on the package. Once it’s dry, you can sand it and do everything else that you planned. Some epoxies dry faster than others, but a manufacturer may ask you to wait a bit longer — perhaps a day — before doing anything else with the patch.
You can also make a wood patch with another piece of wood instead of using epoxy. But for this, you would probably need a bit more precision and work.
Here are some steps:
- Make a cut into the wood around the rot. The cut should be straight and as precise as possible.
- Cut a piece of wood of the same size from another, healthy piece of wood. There should be no spacing between the new wood and the edges.
- Use a wet rug to make the edges of the wood moist so that the glue can activate. Place glue on the new piece of wood too.
- Add glue to the edges of the hole and to the new wood and add new wood to the hole. The glue should be spread properly.
- If you opt for polyurethane glue, it will fill any holes around your new patch.
- Don’t tamper with the glue until it dries. It will be bad for the wood and for your hands.
- Once the glue is dry, you can add two screws to the other side and make sure that they are reaching the other side of the patch and the object.
- Use a sander to take off any glue that foamed up and level it with the wood.
The filler works in a similar way — remove the rot, clean the spot, and add the filler. However, it’s best for smaller areas, and it dries quite quickly.
Sand and Stain the Patch
Once everything is dried off, you can use sandpaper to make the patch the same level as the wood. You can use coarse sandpaper first but then move to something finer once you’re close to being done. Sand until you’re satisfied with the result and remove all of the dust that was created thoroughly before moving on to staining or painting.
If your wood is already stained, you should use the same stain for the patch. Do it coat by coat because you never know what shade you can get, and you don’t want your patch to look strange when compared to the rest of the wood. Usually, two coats will be enough, but that will depend on the type of filler you choose. For instance, if you chose wood, you won’t need to sand much. But if you choose a stainable filler, you will definitely need some staining.
Don’t overlap the new layer with the layers on your object. You can also paint over it for better coverage and if you want to.
When to Repair and When to Replace
When your wood rots, you usually have to make an important choice of whether to fix it or toss it out for a new one. The problem is, how can you tell?
For one, you should be aware that if a piece of wood is severely rotten, you should replace it. It will take more work just to patch it up and make it work without infecting the rest of the wood than just to replace it with a new piece. If you can easily pull it out, replacing it is a good rule of thumb.
Sometimes, repair will be enough. You can use your common sense to determine when this is the case, especially if you’re an expert or you have some experience with wood.
If the rot is in a place crucial to the structure of your home, you should consider replacing it as well. For example, if you look under your deck, you’ll likely notice rot because that wood is always under the influence of the weather.
Take a look at your posts or your windows from the outside if they are wooden. All of these spaces are not that important to the overall structure of your home, so you might as well repair them with a bit of epoxy.
If something wooden yet decorative has been ruined by rot, you might consider removing it. It would be hard to match with epoxy or another piece of wood — without spending a ton of money — and it would take a lot of time. Still, if you’re attached to something, you can fix it, but don’t bother if it’s not that important to you.
When replacing rotten wood, you should make sure that the new mayoral is resistant to water. Remove all of the rot from your piece of wood and then apply the epoxy or any other material as necessary.
If you can’t remove the rot in its entirety, try to use a consolidant that can help you keep the area safe and make it firmer so that the material can attach.
You may also want to read: Rot-Resistant Wood (10 Best Woods That Do Not Rot)
Conclusion
These have been some of the best products for repairing rotten wood. You’ll notice that each of them has a specific purpose in making the rot on your furniture disappear. So, pick one that solves your problem and use it well.
With each of them, it would be a good idea to follow the manual. You can also follow these tips to do it. One of the most important steps is completely removing the rotten part, so it doesn’t spread to the other parts of the wood. Once that’s completely done, apply the filler and proceed to make it aesthetically pleasing in combination with your wood.


1 Comment
Good product suggestions, it’s great that we have so many more choices than we did say 20 years ago. I’ve learned that it’s very important to decide whether patch or take out the rotten wood and replace it. which can be daunting the first time you do it. Thanks!