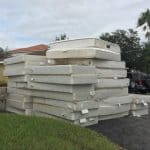
Expanded polystyrene (EPS) insulation is lightweight, affordable, and widely used for walls, roofs, and floors. But anyone who’s tried to cut it with the wrong tool knows it can quickly turn into a crumbly, messy job.
With the right techniques and tools, you can get smooth, precise cuts with minimal dust and waste. Here’s a practical guide to help you do it right.
Understanding EPS Before You Cut
Expanded polystyrene (EPS) isn’t a solid, continuous material like wood or plastic sheet. It’s made from thousands of tiny foam beads that have been expanded and fused together. Those bead boundaries are the key to how EPS behaves when you cut it.
When a blade moves cleanly through the foam, it slices through the bead walls and leaves a relatively smooth edge. But if the tool drags, vibrates, or pushes too hard, it doesn’t really “cut” the beads — it rips them apart. That’s when you get ragged edges and lots of loose crumbs.
Three properties matter most when working with EPS:
- It crumbles if torn instead of sliced: Any sawing or hacking motion that shakes the board will break beads free rather than separating them cleanly. This is why sharp tools and gentle pressure are more important than brute force.
- It creates static-charged dust and beads: The tiny foam particles cling to tools, clothes, and walls. A rough cut produces far more of this mess than a clean slicing cut.
- It’s sensitive to heat: Friction from dull blades or fast power tools can locally melt the foam. That can round over edges, create hard glazed spots, or even warp thin pieces.
Put together, this means the perfect EPS cut is done with a very sharp edge, using steady, controlled passes, and bycreating as little friction and vibration as possible.
EPS is one of the most widely used rigid foam insulation materials, often chosen alongside XPS depending on moisture exposure, strength requirements, and cost. If you’re deciding between the two, see our comparison of EPS vs XPS insulation to understand where each works best.
Best Tools for Cutting EPS
The right tool for the job mainly depends on the thickness of the EPS board, how accurate and clean the edge needs to be, and how fast you need to work.
For thin sheets and quick straight cuts, nothing beats a sharp utility knife.
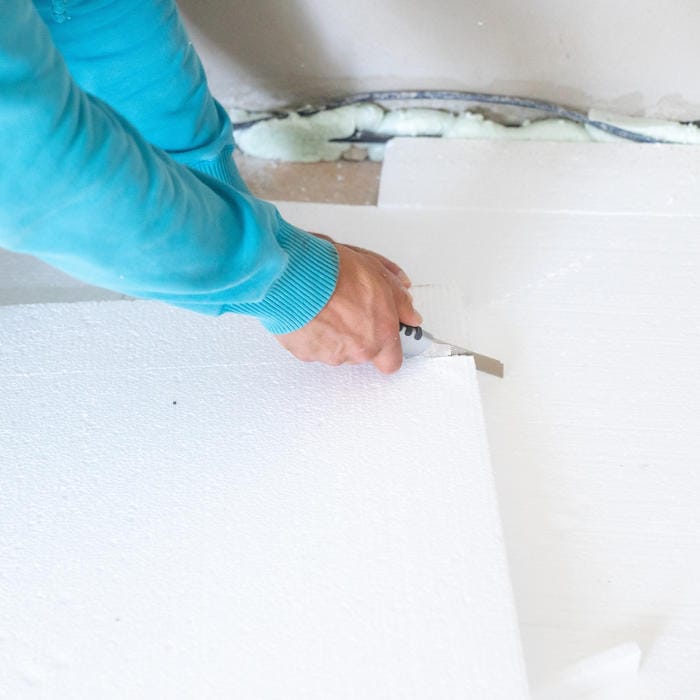
1. Utility Knife (for thin sheets and small jobs)
For EPS up to about 30 mm (1 inch) thick, a simple utility knife often gives the cleanest and most controlled results of any method. It’s also the quickest and most practical option for everyday trimming and fitting work.
Step-By-Step Technique
- Mark the cut line clearly: Use a pencil or fine marker. Thick or fuzzy lines make it harder to stay accurate.
- Clamp or hold a straightedge firmly: A metal ruler, spirit level, or straight board works well. This prevents the blade from wandering and keeps the edge straight.
- Score lightly on the first pass: Don’t try to go deep. Just cut a shallow groove 2–3 mm deep. This first line is your guide track.
- Make several progressively deeper passes: Follow the same groove, increasing depth gradually until you cut through. Let the blade glide; don’t force it. Forcing compresses and tears the foam instead of slicing it.
- Trim and true the edge: A final light shaving pass removes any tiny beads sticking out and leaves a crisp, straight face.
(Optional) Snap the board: Instead of cutting all the way through, once you’ve cut more than halfway, place the scored line on the edge of a table or bench and gently bend the board. It will break cleanly along the cut. Then run the knife along the snapped joint to separate the remaining foam and tidy the edge.
Blade Choice and Handling
Always start with a fresh, razor-sharp blade. Even though EPS feels soft, the fused beads quickly dull the edge, and a slightly blunt blade will begin to tear up the foam. As soon as you feel extra resistance or dragging, snap off a segment or replace the blade instead of forcing the cut.
When working on thicker pieces, extend the blade slightly more than usual so it can stay vertical through the full depth of the foam. Don’t extend it too far, though; the blade still needs solid support from the knife body to avoid flexing or wobbling.
Pressure and Angle
For clean, square edges, keep the knife almost perfectly vertical to the surface of the foam as you cut. Tilting the blade may feel easier, but it creates beveled edges and makes it harder to get tight joints.
Use light, even pressure and let the sharp edge do the work. If you see the foam bulging or compressing ahead of the blade, you’re pushing too hard. Back off slightly and make another shallow pass instead.
When This Method Works Best
- Straight cuts in thin to medium EPS
- Trimming edges for a tight fit between studs or rafters
- Small adjustment cuts on site where power tools would be overkill
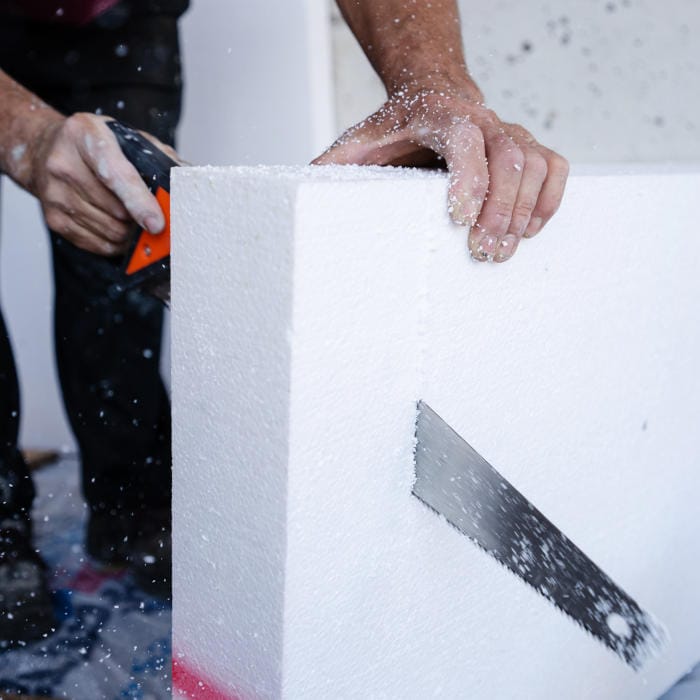
2. Handsaw or Insulation Saw/Knife (for thicker boards)
Once EPS becomes thicker than about 30–40 mm (1–1½ inches) or higher density, a utility knife becomes slow and awkward. At that point a handsaw or purpose-made insulation saw is the more practical choice.
Saw Choice
A fine-toothed wood saw works well for EPS because the smaller teeth slice through the foam beads instead of tearing them out.
An even better option is a dedicated insulation saw/knife, which typically has long, slightly wavy, sharpened teeth designed specifically to cut foam cleanly. They remove material smoothly with less vibration and crumbling, giving you a straighter, neater edge than aggressive, coarse-toothed blades.
Best Cutting Technique
The goal is a smooth slicing action rather than hard, chopping strokes.
- Start with a shallow guide cut: Lightly draw the saw back a few times along your marked line to create a groove. This keeps the blade from wandering.
- Use long, full strokes: Let most of the blade travel through the foam on each pass. Short, choppy strokes shake the material and increase crumbling.
- Keep steady, light pressure: Push just hard enough for the teeth to bite. If you force it, the foam compresses and tears instead of cutting cleanly.
- Watch the blade angle: Try to keep the saw perpendicular to the board for a square edge. Tilting mid-cut can create a wedge-shaped gap.
Support Is Critical
Support the foam on both sides of the cut, ideally under the whole panel. A workbench, stacked scrap boards, or sawhorses all work well. Protect the surface underneath with scrap material so you don’t damage it when the saw cuts through.
Make sure the panel is stable and cannot shift while you work.
f the offcut is left hanging, its weight can bend the foam and rip the last section as you finish the cut, leaving a jagged, torn corner. This problem becomes more noticeable with thicker boards.
Managing the Mess
Sawing EPS inevitably creates loose beads and fine dust that cling to everything. If possible, cut outdoors to keep debris out of your workspace. Placing a drop sheet, tarp, or large piece of cardboard underneath makes cleanup much easier and stops the beads from being ground into the floor.
Don’t leave cleanup until later. Because the particles are statically charged, they quickly spread and cling to walls, clothes, and tools. Vacuuming or sweeping immediately after each cut keeps the mess contained and saves a lot of frustration.
When to Use This Method
- Thick insulation boards
- Long straight cuts where perfect finish isn’t critical
- Quick rough sizing before final trimming with a knife
It’s one of the fastest manual methods, but expect a rougher surface than knife or hot-wire cuts. However, you can always clean up the edge afterward with a few light passes of a sharp utility knife.
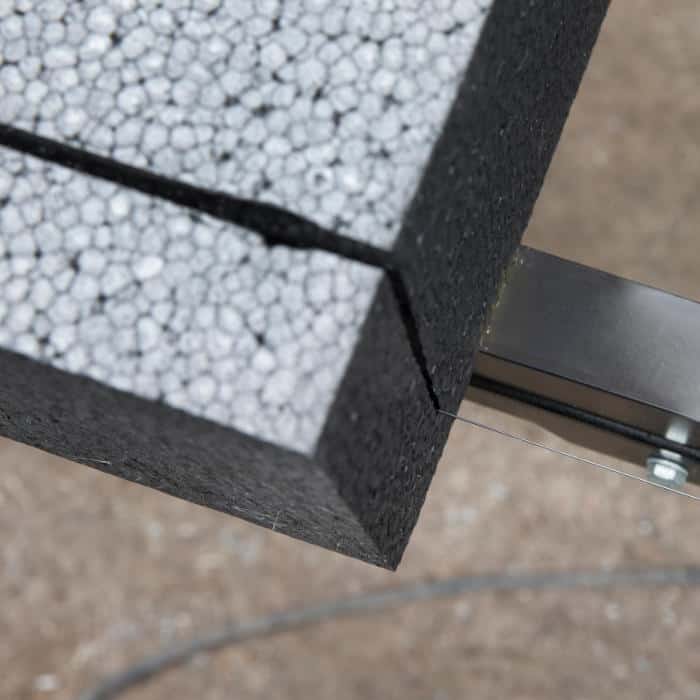
3. Hot Wire Cutter (for the cleanest, most precise cuts)
A hot wire cutter uses a thin, electrically heated wire to melt its way through EPS instead of mechanically slicing it. Because there’s no tearing or vibration, the edges come out extremely smooth, almost no loose beads are produced, and detailed or curved shapes are easy to create.
How to Use It Effectively
- Let the heat do the work: Move the foam slowly and steadily into the wire. If you push too fast, the wire will bend or drag and the cut will wander.
- Keep a constant feed rate: Pausing in one spot can widen the cut or create a slight dip. Smooth, continuous motion gives the straightest edge.
- Use guides for straight cuts: Many table-style cutters have fences; for bow cutters you can clamp a straightedge to guide the foam.
- Practice on scrap first: Different EPS densities need slightly different speeds. A quick test cut helps you find the sweet spot between too slow (over-melting) and too fast (dragging).
Safety and Ventilation
Because this method melts the foam, it produces light fumes and a faint sweet plastic smell. Good ventilation is essential. Work outdoors or in a well-ventilated area, position yourself so any vapour drifts away from your face, and avoid breathing it in directly.
Keep the hot wire well clear of flammable materials, as it is hot enough to scorch nearby objects. When you pause or finish cutting, switch the tool off or unplug it so the wire can cool safely instead of being left hot and unattended.
When This Method Shines
- Perfectly straight, visible edges
- Curves, angles, and custom profiles
- Repetitive cuts where consistency matters
- Fitting insulation around pipes, ducts, or irregular framing
Trade-offs
Hot wire cutting is slower than sawing when you just need to rough-size a board, and the tools cost more than a basic knife or handsaw, although simple DIY versions can be made fairly cheaply. In return, you get unmatched accuracy, ultra-clean edges, and almost no mess.
4. Electric Foam Cutter (for fast, clean cuts)
Similar to a wire cutter, an electric foam cutter (often called a hot knife) uses a heated metal blade to melt through EPS. It cuts faster than a hot wire and far more cleanly than a handsaw, producing neat edges with very little loose debris.
No products found.
How to Use It Effectively
- Let the heat do the work: Guide the blade through the foam at a steady pace without forcing it.
- Keep the blade moving: Pausing in one spot can overheat and widen the cut.
- Use a straightedge for accuracy: Running the hot blade along a metal guide helps keep cuts perfectly straight.
- Clean the blade occasionally: Wipe off melted residue to reduce drag and keep the cut smooth.
Safety and Ventilation
Because it melts the foam, a hot knife produces light fumes and a faint plastic smell. Work outdoors or in a well-ventilated area and avoid breathing the vapour directly. Rest the tool on a heat-resistant surface when not in use and switch it off between cuts so it doesn’t overheat.
When This Method Works
- Fast, straight cuts in thick EPS
- Clean edge trimming with minimal mess
- On-site adjustments without bulky equipment
Trade-offs
A hot knife is less suited to tight curves or detailed shapes and won’t leave as glass-smooth an edge as a tensioned hot wire. However, for quick, straight, and relatively clean cuts in thicker foam, it’s the most convenient powered options.
5. Jigsaw or Reciprocating Saw (for irregular shapes)
When you need to cut curves, holes, or awkward shapes that can’t be snapped or easily guided with a straightedge, a jigsaw or reciprocating saw is very useful.
These tools are fast and versatile, but because they vibrate and move aggressively, they tend to tear the foam rather than slice it cleanly. That’s why a good setup and gentle technique make a big difference.
Blade and Speed Selection
Choose a fine-toothed blade, such as those intended for clean wood or laminate cuts, so the teeth slice the foam instead of ripping chunks out of it. Coarse demolition or pruning blades may cut fast, but they tend to shred the bead structure and leave ragged, uneven edges.
Run the tool at a low to medium speed rather than full power. High speed increases vibration and friction, which can both tear the foam and locally melt it, leaving glazed, messy edges.
Cutting Technique
- Start with a small pilot cut or drilled hole for interior openings.
- Hold the tool lightly and let it glide forward.
- Don’t force tight turns; make gentle arcs instead.
- If the foam starts vibrating heavily, pause and reposition your support.
Tip: For very clean edges, you can deliberately cut just outside your line, then shave back to the mark with a sharp utility knife.
When to Use This Method
- Pipe and conduit penetrations
- Rounded or decorative corners
- Quick on-site trimming where precision tools aren’t practical
Accept the Trade-off
This method prioritises flexibility over finish quality. It will produce loose beads and slightly fuzzy edges, but it’s often the fastest way to create complex shapes in thick EPS. A quick cleanup pass with a knife or sanding block can easily refine the cut afterward.
Quick Tool Guide
| Task | Best Tool |
| Thin, straight cuts | Utility knife |
| Thick, straight cuts | Handsaw or insulation saw |
| Precision or curved cuts | Hot wire cutter |
| Rough openings and shapes | Jigsaw or reciprocating saw |
Reducing Mess and Static Cling
EPS debris has a habit of sticking to everything thanks to static electricity. Once the beads spread, they cling to clothes, tools, walls, and floors, making cleanup surprisingly time-consuming.
A light mist of water on the foam surface or around the cutting area helps tame the static and keeps loose particles from flying everywhere.
Wearing smooth, tightly woven clothing also makes a difference, since fuzzy fabrics like fleece or wool attract and hold onto foam bits.
Additionally, keep a vacuum or soft brush within reach and clean up straight after each cut rather than leaving it for later. Dealing with the debris immediately is much easier than trying to round up hundreds of scattered beads after they’ve had time to spread.
Safety Tips
EPS itself is soft and lightweight, but the cutting tools involved are sharp, hot, or fast-moving. Basic precautions go a long way.
Wear safety glasses to protect your eyes from flying foam fragments. When using saws or power tools, a dust mask helps avoid breathing in fine particles. If you’re cutting with a hot wire, make sure the area is well ventilated so any fumes disperse quickly.
Keep your hands well clear of the cut line and make sure the board is firmly supported before you start. A stable setup not only reduces the risk of slips and injuries, it also produces cleaner, more accurate cuts.
In Conclusion
Cutting EPS insulation well isn’t about brute force or expensive equipment, but about matching the tool and technique to the job. Thin boards respond best to careful scoring with a sharp knife, thick panels are quicker to size with a saw, intricate shapes are easiest with a jigsaw, while perfectly clean, precise edges are the domain of the hot wire cutter.
Whichever method you use, the same principles apply: use sharp tools, make controlled shallow passes, support the board properly, and don’t rush the cut. Paying attention to these basics reduces mess, improves accuracy, and saves time on rework and cleanup.
Start with the simplest tool that suits the thickness and finish you need, test your approach on an offcut, and adjust your speed and pressure until the foam slices cleanly. Do that, and even large EPS boards become easy to handle.
See also: While most EPS insulation is installed in rigid board form and needs accurate cutting, EPS is also widely used as loose beads mixed with cement to create lightweight insulating screeds and floor fills. In those applications the material is poured rather than cut, but the same properties (light weight, thermal insulation, and easy handling) make it equally practical on site. You can learn more about this method in our guide to EPS beads mixed with cement.