")
Appliances tend to be noisy. And while that may not necessarily be a cause for alarm, you still have to keep an eye out. After all, loud noises coming from an appliance can be a symptom of a bigger issue that might lead to a busted machine.
Microwave ovens are no different in that regard. When using one, you’re bound to hear lots of strange sounds coming from the inside that could signal that something’s wrong. This article will help you figure out why your microwave is making that noise and how you can fix it.
Types of Noises Microwaves Make
Like any other kitchen appliance, the microwave makes its fair share of sounds. Broadly speaking, they fall into one of two categories:
- Regular, benign noises
- Abnormal noises
Anyone who’s used a microwave for over a month can tell you what the regular noises might be. Its recognizable hum is usually even and rather low. However, it can get a bit more intense if you use a high-temperature setting. The hums will also differ between the heating and the defrosting processes.
Also, let’s not forget the well-known “ding!” that signals your food is ready. Newer microwaves also tend to use a series of beeps to signal the same thing.
But those are all regular noises a microwave makes. So what are the abnormal ones like? Well, in general, they consist of:
- Unusually loud humming
- Buzzing
- Grinding
- High-pitched “squealing”
- Popping, crackling, or clicking
If and when you hear any of those sounds, it’s time to take a good look at your microwave.
Most microwaves have a similar mechanical setup. Therefore, if you hear some abnormal noises, more often than not they’ll be coming from the same group of basic parts. Luckily, they are easy to reach and remove if you’d like to try some DIY repairs or replacements.
How to Repair a Noisy Microwave: 6 Potential Issues
Drive Motor Making Noise
Microwaves use a motor-driven coupler to rotate the turntable in either direction. Since this motor is doing a lot of the heavy lifting, it is one of the parts that are most likely to wear out. Most often, a clicking sound will alert you of a drive motor problem. However, it can produce other abnormal sounds as well, like hissing and grinding.
First, unplug the oven and open it. In order to reach the drive motor, you have to remove the oven’s appliance cabinet. That means taking off the turntable and all the supporting components beneath it. Usually, the drive motor is located underneath, at the bottom of the microwave, and it’s secured there by screws and wires.
Next, carefully remove the motor and test it for continuity. In order to do that, you will need a multimeter — simply turn the multimeter knob to the highest setting and touch the terminals with the probes. If your microwave’s drive motor is working fine, the multimeter reading should be zero. Otherwise, you might have to think about getting a replacement motor.
Drive Coupler Noise
The drive coupler is located underneath the turntable tray, and it connects directly to the motor. And since it’s the part that does a lot of turning, noise issues are inevitable. For example, if the base of the coupler has a crack in it, the coupler will make a “squealing” sound. Other noises might come from couplers that are either worn out or discolored due to frequent use.
Unplug the microwave oven and open it, then remove the turntable tray. The coupler should be right underneath it. You will recognize it since it looks similar to the three-pronged radiation warning symbol (a trefoil).
Your next job is to remove the coupler and inspect it. With some microwave models, that’s easy, since you can just pop it out. But other models might require you to disassemble the bottom of the microwave and take the coupler out with the motor attached to it.
Next, examine the coupler carefully. Look for any damage or signs of wear and tear. Alternatively, check if there’s a significant amount of dirt or grime under the coupler. More often than not, it will make a din simply because there’s a dirt build-up from prolonged use.
If the problem is simply dirt or grime, rinse the coupler well and let it dry before reattaching it to the motor. However, if you spot any cracks, scratches, and other external damage, you will need to buy a new coupler as soon as possible.
Magnetron Noise
If neither the motor nor the coupler is the source of the noise, you should check the magnetron. This part, with its high-voltage circuit, is what generates heat inside of the microwave. It’s also the source of the regular, benign humming that all microwave ovens make.
Magnetron issues are easy to spot, since it usually makes an unusually loud humming sound when it’s faulty. However, buzzing is also a pretty strong indicator of a magnetron-related issue.
Start by unplugging the microwave and opening it. Next, remove the cabinet and take out the magnetron. There are several key steps to doing that, and they are as follows:
- Discharge the magnetron’s high-voltage capacitor
- Verify that the mounting bolts are tight
- Make sure that the high-voltage diode is working (I will go over the diode a little later).
If there are no issues during these three steps, you can proceed to check the magnetron itself. You will need your multimeter again for this process. First off, set it to Rx1 and then touch one of the probes to a terminal and the other to the magnetron’s metal housing. All of this is to test that there isn’t any continuity. Next, use both probes on the terminals; if the reading is between 2–3 ohms, the magnetron is working properly.
If any of the tests above show a different result to the ones listed, you will need to purchase a new magnetron.
High-Voltage Diode Noise
The high-voltage diode is a part of the high-voltage system of the microwave, together with the capacitor and the magnetron. If there’s an unusually loud humming, most people check the magnetron, but the noise could be coming from this diode alone.
Since this is a high-voltage part, make sure that the microwave is unplugged before you start doing anything. The next step is more or less similar to removing the magnetron. You’ll need to open the microwave’s cabinet and discharge the high-voltage capacitor. Next, remove the diode and prepare the multimeter for continuity checks.
Once again, you should set the multimeter to Rx1. Next, touch the probes to the terminals of the diode, and then do the same but with the probes now reversed. A working diode will show continuity only in one direction. If it shows continuity in both directions (or doesn’t show any), you’ll need to replace the part with a new diode.
Roller Guide Noise
Grinding sounds and minor crackling can be caused by a faulty roller guide. This is the part that connects to the drive coupler and helps the tray spin without friction. Because of its location, the roller guide is the most likely part to suffer physical damage, such as cracks or wear and tear. However, it’s also the easiest part to replace.
After unplugging the microwave, open it and remove the glass tray. Next, inspect the roller thoroughly; check if there are any cracks, discoloration, or signs of wear. Moreover, inspect the wheels and check if they are rolling without any resistance. If you notice any issues, you will have to replace the roller guide altogether.
Cooling Fan Noise
With the magnetron heating the oven, it needs constant cooling so it doesn’t overheat — which is where the cooling fan comes in. Usually, these fans are silent, but if there’s an issue, they can produce loud hums.
After unplugging the microwave, open the cabinet to access the fan. It’s located behind the fan assembly cover, which you will have to remove. Next, make sure to clean off any debris or dust that might have accumulated on the fan’s blades. Once it’s clean enough, check the blades and the fan’s mechanism for any signs of wear and tear.
Should you spot any damage, you’ll need to get a new fan. In the case of debris, you can simply clean it up with a blow-drier or cotton swabs.
Dealing With Other Noises
More often than not, you will hear noises that have nothing to do with the parts listed above. For instance, the microwave’s door can shake to the point where it’s making a rattling sound. Normally, that means the door is loose. If that’s the case, remove it and inspect the hinges and the spacers for any signs of wear or damage. If you spot any, replace those parts as soon as possible.
Crackling and popping noises can also come from the food you place in the microwave. That’s not abnormal, but if the popping is too loud, you’re probably not microwaving your food correctly. Always cover anything that you’re trying to warm up so that the food doesn’t start to spurt everywhere because of the heat. In addition, clean the tray and the inside walls of the oven since leftover food can crackle and damage the electrical components.
Repairing a Noisy Microwave or Buying a New One?
Minor issues will require minor repairs; however, sometimes the replacement parts (and their installation) can be quite expensive. At that point, you should get rid of the old microwave and buy a new one.
You can always get a basic one online at a reasonable price and with a long warranty.
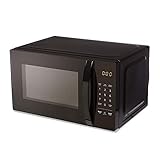
- Now it’s easier to defrost vegetables, make popcorn...
- Compact size saves counter space, plus 10 power levels...
- Alexa is always getting smarter and adding new presets.
- External dimensions (Width x Height x Depth): 17.3 in...
Final Thoughts
Noisy microwave ovens actually work perfectly fine 90% of the time. However, that doesn’t mean that you have to put up with a cacophony of rattles and hums every time you want to reheat your soup.
The tips listed above will definitely help you reduce the noise to a minimum and enjoy your kitchen time with only a pleasant hum in the background.


