
An air mattress is perfect for camping or those nights when you have company and need an extra bed. But with time, this makeshift bed could develop a hole along the seam that renders it uncomfy to use. So how do you fix this?
To fix a hole in an air mattress seam, you’ll need to apply copious amounts of adhesive or rubber cement to the area around the seam. Next, spread it evenly using a rubber-gloved hand. Finally, when the rubber cement is about to dry, cut out a patch from the patch kit and cover the leak.
In this article, you’ll learn the right steps to take when fixing a hole in your air mattress seam. Read on to find out tips and tricks on how to do this effectively enough to restore your air mattress to full functionality.
1. Find the Leak in Your Air Mattress
If your air mattress keeps deflating even after pumping it with lots of air, it’s most likely that it has a hole, thus losing air pressure. In most cases, you don’t have to go buying a new mattress since you can probably fix the leak. But first, you have to find it.
Fixing a puncture on an air mattress depends on its size and where it occurs. The hole could be on the mattress body or along the seam. Again, you need to find the exact location of the leak. This might not be easy to do if the hole is tiny. Fortunately, there are steps you can take to determine the leak’s position:
- Ensure that temperature changes or too much pressure are not the ones causing your air mattress to deflate.
- Inflate the mattress halfway as you listen for sounds of escaping air along the seams. Close the valve to lock the air inside the air mattress.
- If you can’t hear the sound of escaping air, apply pressure by pushing down various sections of the mattress with your fist. This will enable you to determine the exact leak location. If this fails to work too, move on to the next step.
- Mix soap and water and use a sponge to wipe down the mattress carefully along the seams with the solution. Continue applying pressure on the mattress to force air out through the leak. You will soon notice bubbles coming out of what is the puncture area. Mark the hole with some masking tape. This is where you’ll apply your patch.
Another way of locating your leak is by soaking the deflated mattress in a tub of water. Once again, if you notice air bubbles, this indicates the mattress has a hole through which the air is leaking.
Now that you’ve found your leak, it’s time to fix it. Let’s see how to go about this next.
2. Prepare to Repair
Inflate your air mattress again until it’s halfway or 3/4 full. Remember to seal the air in by closing the valve. Next, wipe off any soapy water that might still be on your mattress. Use a damp cloth, then dry it off with a dry paper towel. Allow the mattress to dry completely before you start any repair work.
You will need a couple of items to do the repairs. Here is what you will need:
- Rubber gloves.
- Fine sanding paper.
- Rubber or plastic patch.
- Books or bricks to use as weights.
- A bicycle repair kit, rubber cement, or multi-surface adhesive.
Once you have everything ready, it’s time to begin. First, deflate your air mattress to prevent it from moving about as you work. Then, follow these simple steps to make your mattress fit to use once more.
3. Sand off Any Uneven Material Near the Hole
Wear your rubber gloves, then prepare the leak area by ensuring that the place is smooth. This is because the patch won’t stick well if the site is rough. Using the fine sanding paper, gently sand off any fuzz around the general area of the hole. Try and clean off an extra half inch or so around the leak.
Be careful not to overdo the sanding since this could ruin your mattress.
4. Cut Out the Patch From the Patch Kit
To make a patch, make use of an old shower curtain or anything else with a similar thickness. However, the patch needs to be equal in size to the sanded area or slightly larger to cover and even overlap the leaky area. This ensures the area is airtight.
Note that if the hole is significantly bigger than the patch, it might not be possible to fix the mattress.
Alternatively, you can use a special repair kit designed for the air mattress or a tire repair kit. Other DIY options include using duct tape or a thin piece of plastic to cover up the leaky hole. You may also consider using hot glue but be extra vigilant when applying this. If you allow the glue gun tip to touch your air mattress, it will melt it.
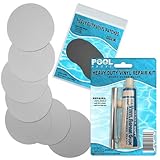
- This vinyl repair kit from Pool Above includes eight...
- Glue pack includes 1 fl oz (30ml) tube of vinyl...
- Ideal uses include patching pool liners - inside or...
- Times are tight. We get it. The prices for those pop-up...
5. Glue Your Patch Over the Hole
Smear a generous amount of multi-surface super glue or rubber cement from the patch kit on the patch and all-around around the leak area. Also, you can use superglue as your adhesive, gorilla glue, contact cement, or epoxy.
Gluing is both efficient and straightforward. It also works better on seams than patching.
Besides, you only need to apply a few drops to make a durable seal. Just be careful the glue doesn’t land anywhere else but the seam because it can damage the mattress as you attempt to clean up.
With your rubber-gloved hand, smooth the glue a bit. When the glue is mostly dry, place the patch on the mattress and press it down hard using your hands while making sure it’s centered correctly. Wipe off the excess adhesive from the sides of the patch
6. Apply Pressure on the Patch
Place some heavy weight over the patch. You can use anything that will do the trick, such as a big book, cement block, or a large brick. Allow it to rest atop the mattress until the glue sets. This could be anything from 6-12 hours.
7. Reinflate the Mattress Once More
Once the patch appears nice and hard, it’s time to inflate the air mattress to its usual state. If you followed the above steps keenly, your mattress should be holding air in without any leakage. It should be as good as new.
However, if it’s still leaking, you might have missed some other tiny hole or more along the seam. Repeat the process of locating the leaks once more and fix them as well.
8. Prevent Your Air Mattress Getting Holes
Let’s explore how you can prevent any more holes from messing up your air mattress.
- Give your air mattress plenty of room – move furniture and any sharp objects further away to avoid any accidents.
- Avoid overfilling your air mattress since too much air pressure inside the air mattress can lead to small tears along the seams.
- Before you set the bed, clear the floor of all debris or raise your air mattress off the floor.
Final Thoughts
As you can see from the above procedure, repairing a leaking air mattress is not challenging. While finding the holes could prove a bit tricky, you are as good as done once you locate them. You only require to have a few basic materials and not that much time to fix the leaks.
So, go ahead, restore your air mattress and make the most of your camping nights. Say bye to uncomfortable nights with hips jabbing into the hard ground!


